(though there was plenty of prize support from Warlord, BTD, Rubicon, etc...)
There were 11 Axis and 11 Allied players, and I had volunteered to be Allied commander and assist in the strategic planning (matching Allied players to Axis on themed tables with set missions, and a secondary objective, to get the best out of the players and the themes and to ensure the Axis were driven backwards...) MMGs were given 6 dice and LMGs 4 for this event.
Some of the themed tables...


At 1250 pts, I opted as last year for a wholly Inexperienced force but unlike last year, took two platoons.
My force was taken from the Kasserine Pass theatre selected and consisted of the following:
1st Lt
2nd Lt
3 x 12 GI's with 1 SMG
2 x 12 GI's with 1 SMG and 1 BAR
2 x Bazooka teams
3 x MMG teams
1 x Mortar team
1 x M2A1 medium Howitzer
1 x M3 halftrack
2 x M4 Shermans
GAME 1
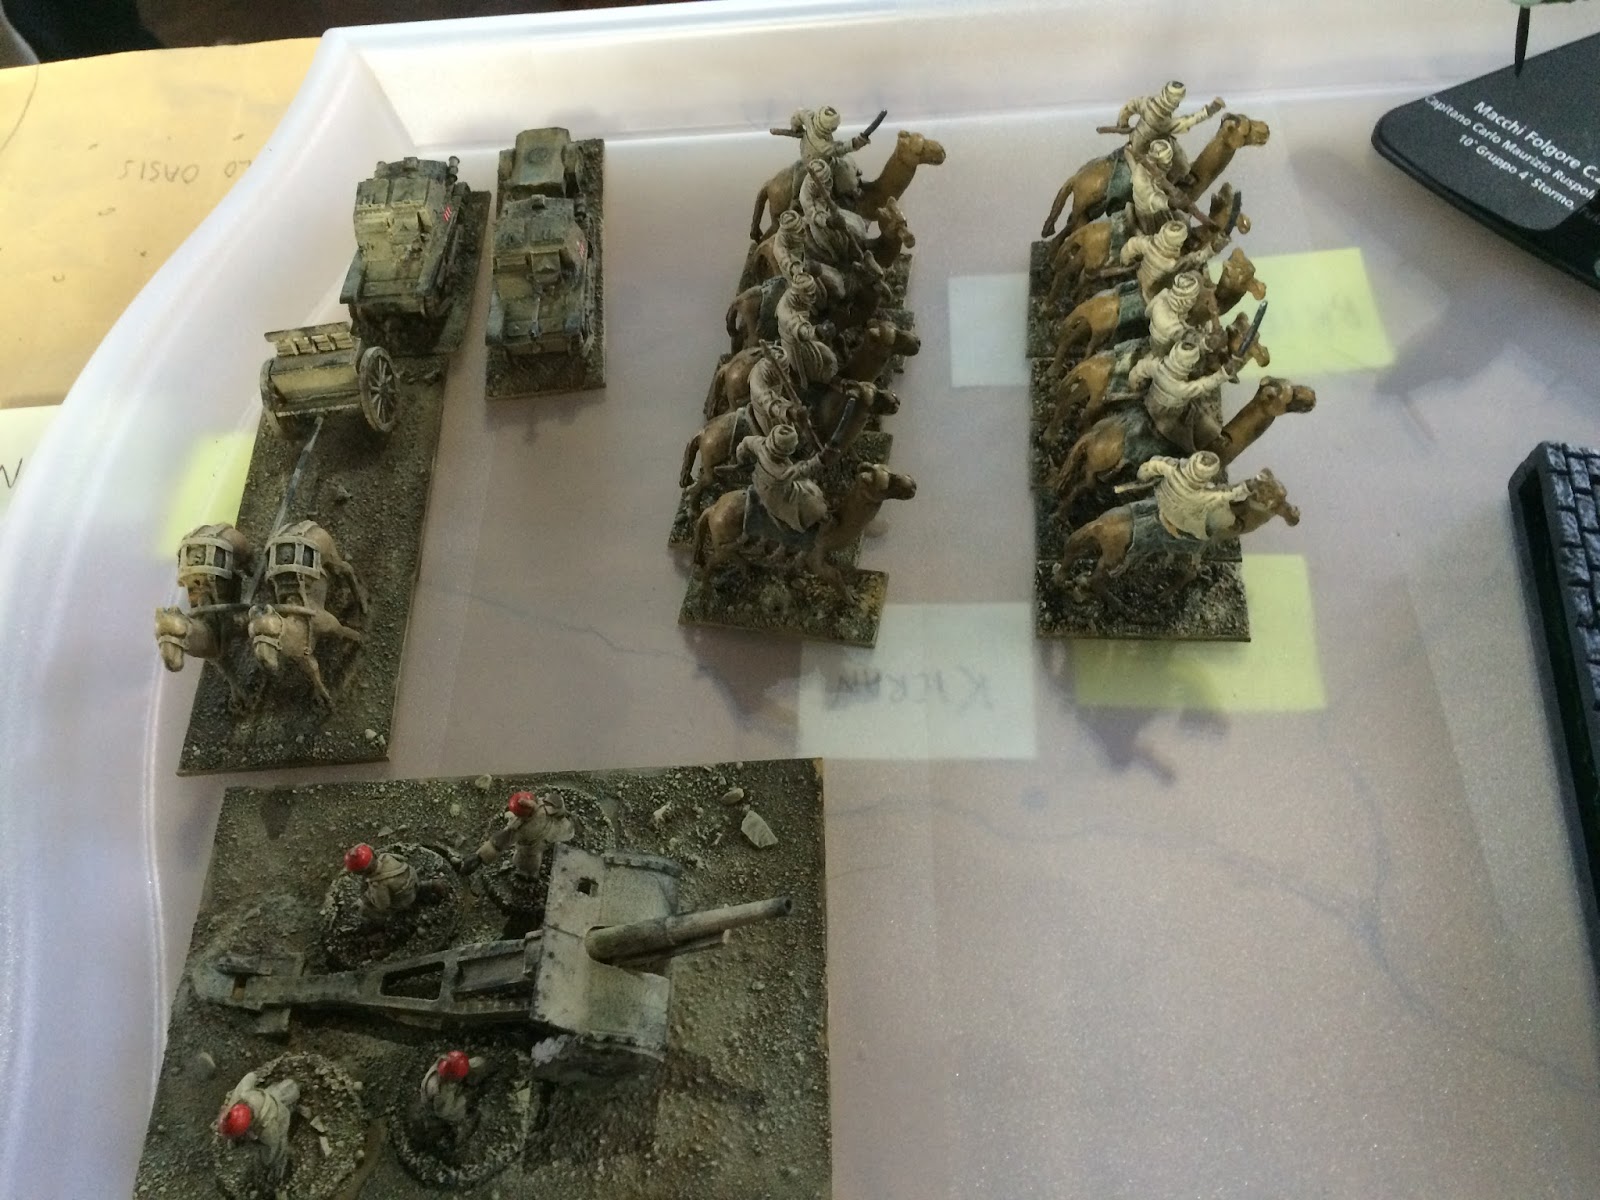
After fumbling my way through the 1st round match up's where the Allied forces were defending I found myself facing Stuart Kelly's Colonial Italian force (with regular Italian units and Inexperienced colonials) on what looked a fairly open board with a hill in the centre my GI's had to Hold until Relieved...

Italian 1st Lt
Italian 2nd Lt
5 x 8 colonial troops
2 x 6 colonial camel cavalry
Medium Howitzer
Camel tow
A small MMG tankette
A small flame tank
Blackshirt squad with LMG
Warplane fighter
2 x Medium mortars

Stuart deployed all his infantry, leaving the following in reserve
My first wave included the medium howitzer, a Sherman, 3 GI squads, mortar and an MMG
For reserve, the 3rd MMG, 2nd Sherman and 5th squad in M3, as well as both bazookas and officers.
As usual i got excited and took the picture below after the first 4 dice had been pulled...

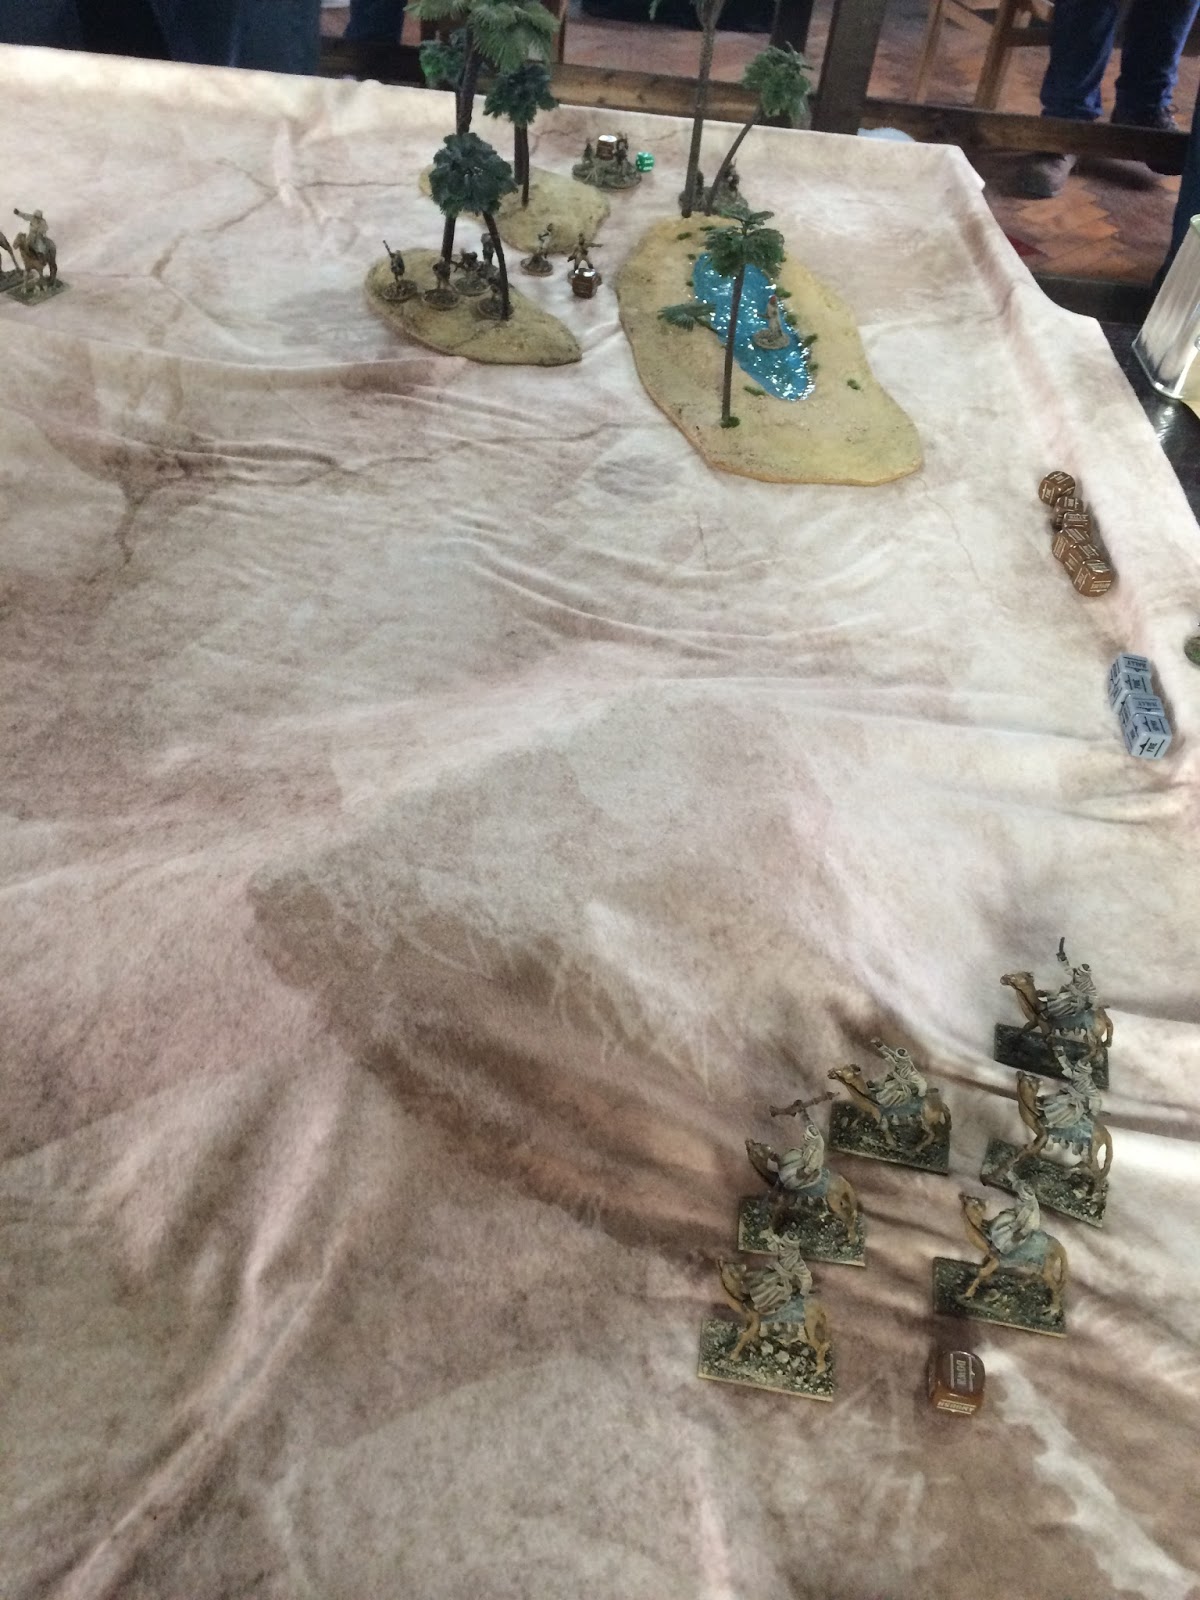
Stuart has run 3 colonial units up towards my hill, but my MMG team has killed 3 of those nearest it. The crates in the village is the secondary objective and Stuart kept a unit in there and another on the hill to see how I deployed...
I decided to aid the hill troops by running on the Sherman and a GI squad behind it but advancing on with 2 squad which wiped out the squad of colonials already reduced by MMG fire. On my right, the mortar and MMG ran up to the hill on my right...

Turn 2, Stuart had to use waplane on his first dice and it failed to come on, then I drew the next dice and activated my hill squad, reducing a second unit of colonial to 2 men. I then advanced the Sherman and opened up with the MMG's, adding pins on the two units but not killing many... The MMG team lost one man to rifle fire from the village as his colonials at the foot of the hill both refused (failed) orders to assault the GI's up there


With one unit in the village, I advanced both first wave GI's there up to shoot at the mortar spotters, killing both forcing Stuart to redploy his mortars. And then the reserves started coming on... Well, mine did as I brought the 2nd tank and M3 with GI's in up on my left and they proceeded to pile on the pins and casualties onto the colonials there until they broke. My 2 bazooka's ran centrally. Stuart got the medium howitzer on and a unit of camels who lost 2 men to an ambushing MMG on my right hill. They recce'd away from an advancing GI squad from reserve.His two regular tankettes never showed, and his second camel squad kept out of site behind the oasis on Stuart's left...

Turn 3
Stuart had to use his warplane which strafed a squad which went down but still took pins and casualties...

On my right, my MMG team got shot by the blackshirts and wiped out, so my 3rd MMG replaced it, while the far right camels fell just short of connecting with the mortar team. The two men colonials assaulted the GI's on the hill and died, while the other squad died to the Sherman there. The last colonial infantry unit ran into the town to help the Italian officer as the US consolidated their hold there


The Sherman in my centre bottled a ram against the Italian tankette (although I blame my pistol toting 2nd Lt being too busy chasing camels than commanding his squads)

On the right, the 3rd MMG and mortar both got lost to mortar and Blackshirt fire
Turn 4 saw my hoitzer roll a 1st shot 6 and take out the Italian one while my tanks maximise their fire and not achieve much other than set the tankette on fire but it stayed in the fight and also scare some camels behind a hill. Stuart had to wave off his plane and his colonials ran into a house. I decided to be bold and ran out the house I was in an overwhelm the Italian officer, knowing next round the first dice would be critical to control the village secondary objective. I also didn't take any pictures this round.
Turn 5. I got the first dice and did the ARITHMETIC (Not Mathematics). I had 12 men, 13 attacks to assault 7 tough fighter colonials in the house, with us all dying on a 3+... I had been lucky so far, so pushed it and in we went... Stuart rolled well and killed 9 GI's, and I rolled slighlty less well but well enough to kill all his guys, consolidating not into the house but onto the secondary objective. I then moved the Sherman from the village to take on both the tankettes and missed the main gun shot v the flame tankette. The airplane came in and strafed an infantry unit. behind my hill not well but enough to ensure it could suffer from the cavalry next turn as I went down. The flame tankette passed its orders check and blew the cocky Sherman to bits. Of course, Stuart then rolled a 1 to run out of fuel...


While 2 Lt chased off those camels again (in his own mind) and the 'zook's and two GI units consolidated their hold on the hill


Turn 6
Having to remove the warplane hindered the Italians again, allowing the Sherman and GIs to wipe out the remaining camel forces and the Blackshirts and tankettes advanced hoping for turn 7


But it never happened, and even had it done so, the Italians couldn't shift the GIs so the game ended with a big 4-0 win for the Allied commander
I did get very lucky in this game, what with getting all my reserves on in turn 2 while the Italians came on piecemeal, taking out the howitzer with one shot ranging in, getting dice priority and wiping out the Colonial infantry in short order... Stuart's force was nice and fluffy and would have hurt if he'd got into melee but he only did that the once and I had numbers on my side.
Overall, the match ups had proved close, playing my priority mission (double points for that game) allowed the Allies to edge a 21-17 first round win meaning demotion (for General Simms) and a replacement Axis commander while I retained the Allied post, which I didn't fluff as much second time round, getting good match ups for tables and opponents.
GAME 2
Myself and the newly promoted Axis commander, Chris Buckle were last after the pairing, so we were left to face off with the Axis defending in Maximum Attrition...
I wasn't optimistic given the very fluffy he had, consisting of an all regular force with:
2 x 2nd lt, 4 x 8 Heer with LMG, 2 MMG's, Medium mortar , 3 x 88mm guns and 3 tows...

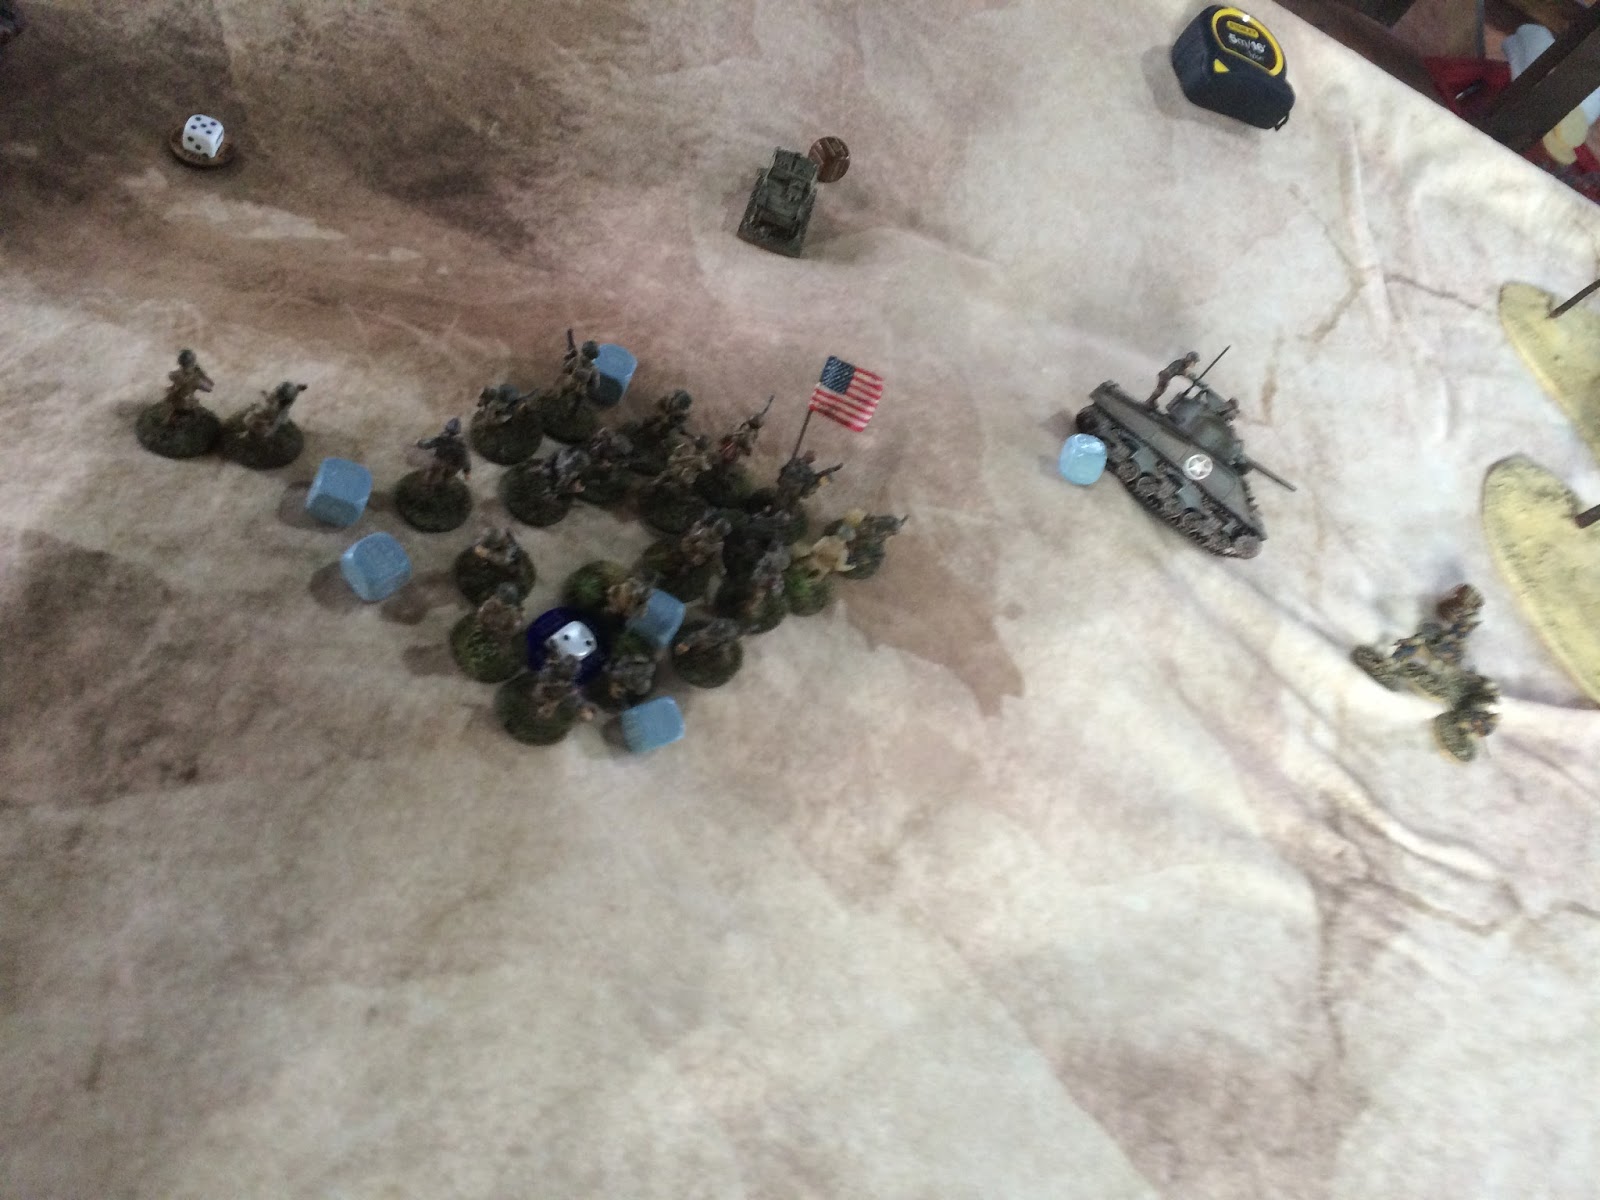
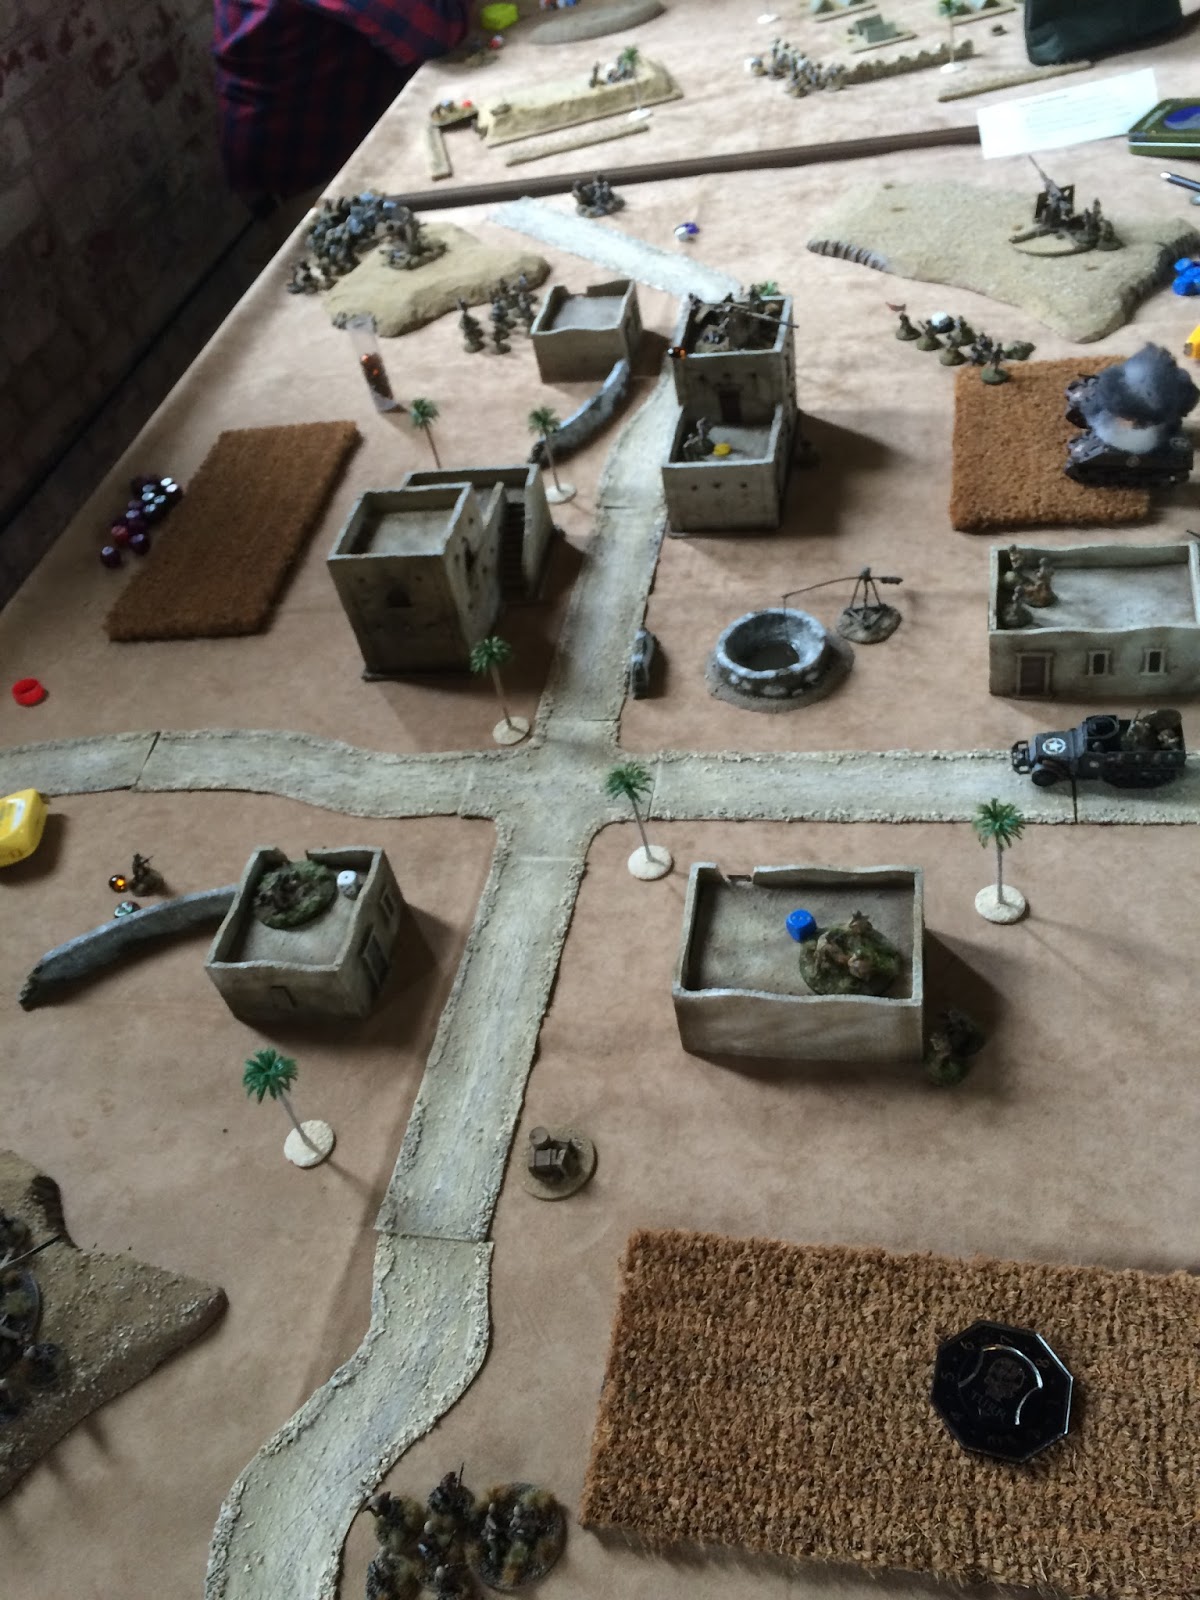
Awesome list for the event and theatre, and felt I'd die in droves but then we found out the only table left was another Take and Hold, though Axis were defending. I was pretty happy with that, but Chris wasn't as he couldn't set up his gun line. Instead he opted for one gun on the roof, another on the ground floor, control of the ground floor being the deciding factor in who won the game.

I deployed all my infantry as below (ignore top left, that is the german reserves and first wave). My plan was to run the GI unit on the left cornfield into building and control hinder his first wave, while top unit of GI's (visual just above the roof 88) ran into the small house to do the same. The 12 man unit behind the hill with the abandoned 88 and the other 2 units nearest my edge would race forward with the officers and take the building, while the 2 MMGs this side and the mortar would keep the 88 on the roof pinned


Turn 1. Yeah, I got the first few dice, running the two GI units into the buildings as per my master plan, and also getting the MMG on the roof cover Chris's backline in ambush. I tried to hit the 88 but failed while Chris put both it and the unit on the objective ground floor ambush. I lost a few men from a HE 88 shell as they ran, taking 2 pins. and and another few from the LMG and rifles. Chris brought on his 1st wave in the form of an 88 with tow, mortar and squad all on top left of picture below.

Turn 2 and Chris got the drop on me, charging my inexperienced squad top left in the building with his regulars... He killed just 2 inexperienced GI's and lost badly, and I decided to keep him busy by consolidating out into the open to threaten the mortar. His second dice put the objective holder squad on ambush. I then tried to assault the house and got mullered, only two men getting in from the 8 men left after turn 1. I did pass my morale check after ambush had reduced me to 2 men and no NCO, and the two GIs killed 2 Germans... awesome). A second squad went in, and we both lost 4/5 men, before second round I won leaving me with 2 men... The other squad nearby took another 88 HE round from the roof for four pins and failed to rally. But I had secured the objective, paying a heavy price. Now I had to defend it and try and get rid of the 88 on the roof. Chris had brought on another Heer squad near the mortar, firing at my squad that had just left the house, and I lost a man to shooting. He then brought on an MMG to support the squad. His right side brought on the other 88 and both officers. I brought on a sherman and medium howitzer as well as a bazooka team, but one sherman and the bazooka crewing the M3 failed to show. My response was to aggressively defend what I had, passing my morale to assault his 8 Heer that had reduced me to 7 GI's. I had first dice advantage and managed to kill 4, losing 1 in return. I then charged out the house with the full GI squad and took out the newly arrived MMG team. Chris moved his tow to stop it going end of turn. As you can see below, his mortar and 88 were now dangerously exposed...


There is no doubt the dice were very bad for Chris this turn, and I was more than lucky (again)
Turn 3. The squad that took out the MMG charged the mortar taking it out. The other squad of 8 that had taken out two Heer squads charged the 7 men of the 88, and lost leaving 2 gunners. They fired at the newly arrived Sherman and missed. The other Sherman came on an went down to an AT shell form the 88 on Chris's right and tall weapons that could put pins on the roof 88. The 4 pinned GI squad failed to rally. Rommel (ok, it was a German 2nd lt) got shot by a long range MMG) whiel the closer MMG only pinned the other officer, who promptly failed an assault against the MMG closest to him. The halftrack and bazooka came on and didnt hit anything. The 88 on the roof had 3 pins. lost a few men and went down... The last German heer squad had outflanked towards the secondary objective and advanced on taking out my ineffectual mortar with exceptional damage


Turn 4 I assaulted the 2 man 88 and won easily, consolidating down towards the road. The remaining Sherman killed another man off the roof 88 and added another pin, while the bazooka in the M3 killed a Heer off the new squad. My other bazooka ran up to corner of the building and missed the 88 at long range. The second officer got MMG'd and the pinned squad rallied when the 1st Lt ran and told em to get their act together. Chris ran on his second MMG team towards the main objective, still held by my two men...


Turn 5 I needed to clear the ground floor to accommodate the newly rallied squad, so I charged upstairs with 2 men against the 88 and lost, allowing the GI's with the flag to run in. I then lost the M3 and bazooka to an 88 shell. The 88 on the roof missed the sherman in front of it, and the German MMG ran forward again, and my big squad that had taken half the german forces out ran down teh road to intercept. The bazooka team and newly redeployed US MMG team added pins on the Heer unit nearest the secondary objective.


Turn 6. I got the first 2 dice, assaulting the MMG team and the 88 on the roof, winning both fights and securing the primary objective. The German Heer unit near the secondary had to go down due to pins, and my bazooka team ran forward to claim it... Only for Chris to take careful aim with the 88 overlooking it and obliterate them...


The game ended with a 3-0 victory for the inexperienced GI's but was greatly helped by dice in rounds 2 & 3, both with mine being good and Chris's being pretty awful. The mission and board also favoured me and the numbers I had was another thing in my favour. I lost 26 men in the first 2 turns from 3 units I had assigned to take the objective. Chris played well and his army was my favourite in terms of them, as you hardly ever see an 88 on the battlefield never mind 3.
Additionally, the match ups had worked out well too, with a resounding 28-16 tally over the dastardly huns...
GAME 3
The final round came up, and the Germans were defending. Again, I ended up within the last two games to be paired (dispelling the myth that in somehow arranging the match ups I was fixing them in my favour). Having already played Stuart, I was matched attacking Pete Melvin's all Veteran DAK in Encirclement, a variation of Envelopment where both sides scored more for getting units off the board.
Pete had the same force I had faced in the 3rd game of End of the Beginning 1 which stands otuas one of the best games of Bolt Action I've ever played (Battle report is somewhere in this blog, bloody heavy mortar is all I need to say!!!)
The DAK consisted of 2nd Lt +1, 3 x 8 men squads with LMG, Pioneer squad with flammenwerfer, MMG team, heavy mortar, single heavy auto-cannon, open topped quad auto-cannon carrier, Stuka

Set up is random dice out of the bag deployment, and I kept off a bazooka team in the M3 while Pete kept off his Pioneers. Secondary objective was near the oasis. Scoring is based on 3 points for a unit off, 2 for a unit in enemy deployment zone, 1 for each unit killed.
I had reservations about this game as the board was fairly open and my dice superiority was considerable, but that's for after. I deployed heavily on my left, and Pete did likewise on his right, which left me outnumbering him on my right where I had a bazooka, Sherman, GI squad, 2nd Lt and MMG team v the quad flak (off picture behind the rocky spire) and an MMG team on the small dune

Turn 1
I drew the first dice, advancing my GI squad on the right up behind the ruined Scorpion mine clearing tank (Rich H's work) to shelter from the Quadflak, and continuing my lucky dice by critically hitting the veteran DAK MMG team. On my left, I concentrated fire on one squad, killing a few and adding a couple of pins while the Sherman killed a few Germans who shook off the pins and killed a few GIs while advancing... I was optimistic I could roll up the numerically inferior Germans, looking at the balance below

Turn 2. Oh, the stupidity of over optimism... The Stuka came on and obliterated a squad with a single well placed bomb and some strafing. I also charged a unit and the dice gods abandoned me. I killed 2 DAK on the ridge above the pass and lost my squad. I lost my howitzer to a heavy mortar shot.The other two units traded shots and the inexperienced GIs died in their droves, though they took a good number of DAK with them. On my right, my MMG team advanced up the abandoned British trenches while the Sherman and GI's put pins on the quad flak reducing its effectiveness (not helped by Pete's dice). In true wargaming fashion, I didn't take any pictures getting caught up in the heat of battle at the pass...
Turn 3. The Stuka flew off, and my Sherman on the left took out the heavy autocannon and added pins and killed DAK nearby. However, the Pioneers advanced on from Pete's right and my only big squad left ran away. I continued to advance on the right, adding pins to the quad which withdrew backwards after failing to pass command

As you can see below, I had an MMG and mortar top left on the rocky hill but 3 men left on teh pass ridge and a 1st Lt near teh German officer and teh lone German from another squad

The right side of the board looked decidedly better

Our respective dead by end of turn 3...


Turn 4 Stuka came in with its last bomb targetting my right advance but my squad went down and it missed, though I took a few hits and a pin from the MMGs. I charged teh lone DAK trooper with my 1st Lt and fought 3 rounds of combat before I died (Pete was just toying with me). My 3 men above the pass assaulted his officer and lost, though I did kill his assistant. Pete then consolidated towards my edge, along with advancing his pioneers to wipe out my MMG team on the ridge.The mortar went next turn after the other remianing DAKsquad ran up.The heavily pinned squad was wiped out by the Sherman. On my right, I hit the open topped quad flak with my main gun,immobilising it despite the double damage roll 1 & 2. The bazooka team and 2nd Lt advanced behind it. My outflanking M3 came on behind teh Pioneers but ignored them and concentrating on driving down towards teh German edge shooting but missing the mortar.

Turn 5 Pete had beaten me badly on my left, but didnt have enough forces to hold his entire line. The stuka flew off MMG went on ambush for the officers attempt to run off. My M3 and bazooka ran off, as did my MMG team in the trenches. Pete ran off his Pioneers and surviving DAK heer squad. My Sherman advanced and pinned the quad to 6, the 2nd Sherman advanced to run off next turn. The officer made his run adn was cut down in a hail of lead...
Turn 6 The Stuka came back to MMG my bazooka on right who went down (as if he survived it was still 2 VP's) and he did. My GI squad assaulted heavily pinned and immobilised quad taking it out and consolidating it off. Every one else who could ran off the board...I lost my MMG to heavy mortar shot.
The game ended and in victory points it was 30-15, and a 3-0 win. But it didnt reflect the game as I had lost 9 units to Pete's 7 and I won because I got 7 units of the board to Pete's 2. I had 7 more to start. However, thats the breaks in war i suppose, but it wasnt a patch on our game last year and I have mentioned to Sam (Downorder) that it needs a bit of tweaking...
So I had another win for my GI's (Did I mention they were all Inexperienced?) The Allies also won teh round again convincingly, so i think i had a good day all round. It was a great day of gaming with really fun and fluffy lists.
I also got the Hero award. Not sure if its cos i won all 3 games and had most victory points (excluding joker winners), becasue I was an awesome commander or because my 2nd Lt chased camels with his pistol, or just becasue I was incredibly lucky, but it was a hell of a good day wargaming and everyone had a grand day out. Themed campaign days are definitely the way to play this game!